Monthly Archives: March 2012

As I’m currently on a little mini-break with Mr Crafty Love and the bambino’s, thought I would share a great blog entry on making paper beads! These are so easy and can make lovely beads, have a go at different effects until you get what you’re after! This has been re-blogged and the original author has a great facebook page which can be found here:

http://www.facebook.com/laurabethdesign

Also, I thought you may be interested to see some absolutely gorgeous paper beads made at a great FB page called Looking For Grasshoppers wich can be found here:

http://www.facebook.com/LookingForGrasshoppers

Hope you enjoy this blog, please comment if you do…it’s the only feedback us blogger’s get! 🙂 x

laurabethdesign

As promised today is the day I share the instructions on how to make the first piece of jewellery I ever made!

When I was 11 I went to a mother/daughter craft day.  The subject jewellery making.  It was there that my passion for jewellery making was ignited.  We only started with the basics (paper beads, felted beads, machine embroidered work) and I wasn’t to learn about working in silver for another 8 years but I’m not sure I’d be who I am today without having been on that fantastic day.  I don’t know if I ever told my mum that or really thanked her for it.  I guess nows the time.  Thanks mum!

Now for the tutorial…

How to make paper beads

You will need:

  • Paper (colourful magazines, wrapping paper, flyers, etc)
  • Cutting mat
  • Scalpel/ craft knife
  • 30cm ruler
  • pen
  • cocktail sticks
  • glue
  • Varnish (I find quick dry clear…

View original post 667 more words

‘How to’ – Up-cycled paper wreath!

Hello and welcome to Crafty Love’s third ‘How-to’ blog. This time I have the pleasure in sharing with you a wonderful idea to make pretty paper wreaths.

I’d like to thank Ruth James for contributing this idea and guide, she really is a very clever crafty lady! 

You can find her wonderful handmade items at her Facebook page here (you simply have to see her beautiful rainbow button cushions):

http://www.facebook.com/pages/Ruths-emporium/264655396927059

She also has a great page where crafter’s can display their work for sale and where craft lover’s can buy quality handmade items:

http://www.facebook.com/pages/Lets-buy-handmade/218394444924206

Now let’s get crafty! 

YOU WILL NEED:

Some paper, you can use old magazines, comics , books or even junk mail.

Glue, I like to use a glue gun.

A ribbon or some sort of ring for hanging.

A little sprinkling of imagination.

Image

1) Prepare your base

Remove the cover of your chosen magazine or book (if you don’t have a cover just use a piece of card, cereal box card is perfect ). Fold a piece into a long strip and fold in half. Place a metal ring onto the strip at the fold and glue the folded strip onto to the cover. This will be used to hang the wreath. If you would rather you can use a ribbon or piece of string instead.

               Image
2) Make your cones

Make lots and lots of cones. The yellow pages wreath took 136 cones. (see pictures below)

Image

Fold over from the edge and roll inwards.

Image

Roll up until the whole page is rolled into a cone shape.

Image

Secure cone with glue.

3) Form your wreath.                               

When you’ve made a few start to attach to your base. They will naturally form a circle so don’t worry about the placement too much.

Image

4) Keep going! 

Now you just keep going until you get the look you are after. If you want to you can spray with a varnish to help the wreath last.

  Image

Image

Image

And there you have it! A gorgeous wreath! Would look great hanging above a telephone table in a hallway don’t you think?

Image

You can get various looks by using different amounts and sizes of cones, as well as different types of paper. If you just want one layer of cones you can make a pretty flower or just add a spiral of paper in the middle to hide the center.  Cutting some of your pages in half will give you different sized cones. The smaller cones look great on top of the larger ones.

You can also try using lots of different things. If you tend to collect receipts why not make a mini wreath out of them? Just add a magnet to the back and use on your fridge. You can even use old photos! 

Image

I hope you enjoyed this ‘How to’ blog. 

Please leave a comment if you did! Thanks again to Ruth for her contribution.

If you want to check out Crafty Love’s Facebook page for lots more up-cycling inspiration you can find it here:

http://www.facebook.com/pages/Crafty-Love/167446303366034

Until next time! 🙂 x


How to – Bits and Bobs Cushion!!

Hello and welcome to Crafty Love’s second blog!

This ‘how-to’ has been contributed by a lovely crafty Facebook page called Magpie. The creator of this page is Alex Hickman, who makes some lovely items out of lots of unwanted bits and bobs!!

You can find Magpie here http://www.facebook.com/pages/Magpie/192814304073878

With this cushion design you will never need to throw away another tiny off cut of fabric again!

This design does take quite awhile to make but I promise its worth it, so gather up all those bits of fabric you can’t do anything with and start sewing!
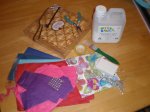
Image

You will need;

Off-cuts of different fabrics

Cotton fabric (old shirt or lining will work) 11×17 for this cushion, or your preferred size.

Lining fabric 11×17 (or your preferred size)

Two pieces of fabric for the back of the cushion 11×18 1/2 inches (x2) 

Thread

Scissors

Sewing machine (this is for sewing the whole thing together, can be done by hand if you haven’t got a machine)

Inner cushion 11×17 (or your preferred size)

Embroidery ring (if not using one of these please ensure you pull cushion fabric taught while adding your fabric scraps)

Fabric pencil

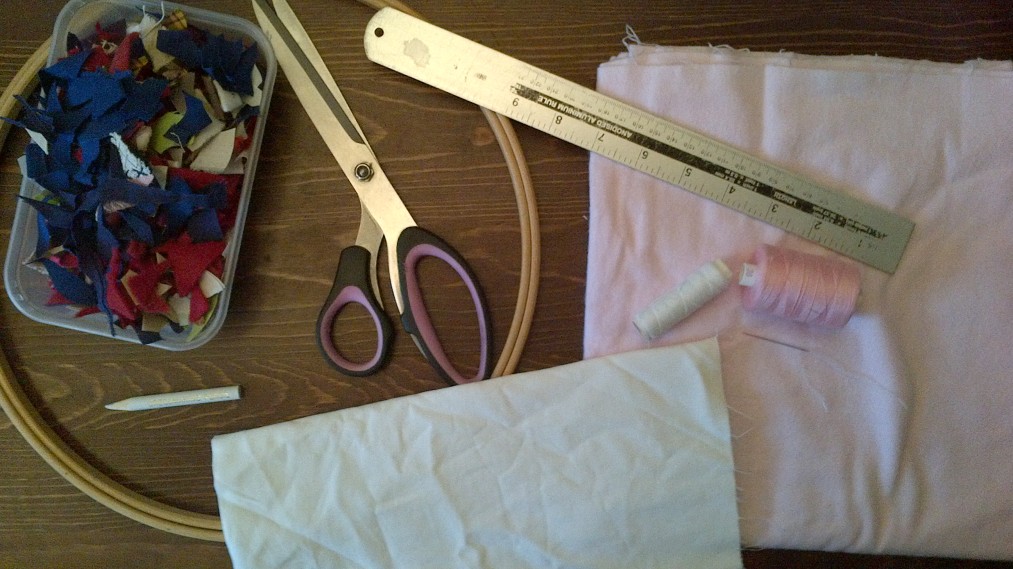
1) Prepare your scraps and measure out fabric

Cut all your off-cuts up into small pieces. Try not to be too neat with this, you want all the pieces to be different shapes and sizes. Mix them all up and put them to one side.

Draw out the size of the cushion onto your cotton fabric, I’ve done a 17×11 but you can do any shape or size you want, remember to leave at least an 2inches around the edge! I find it helpful to draw a line around the edge of the fabric where I intend to sew, so that I can follow it later with the sewing machine. use your fabric pencil for this. 

Image
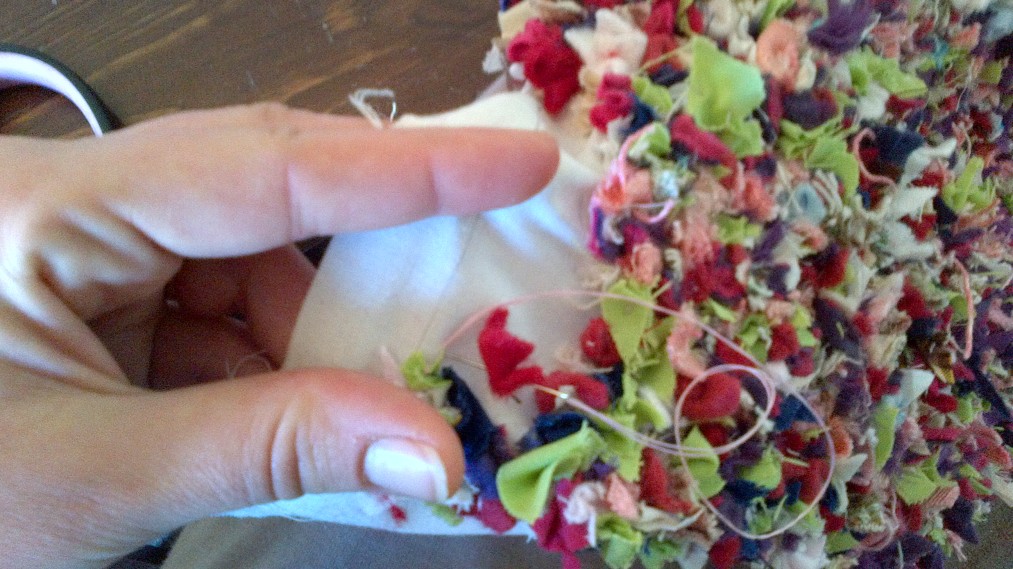
2) Add your fabric scraps to the cushion

Place the fabric into your embroidery ring (you can do it without, but remember to hold the fabric taught)

Bring your needle and thread through the fabric from the back. Now fold an off-cut onto your needle until the whole piece is folded on (see pic above). This does not have to be done neatly! Put your needle back through the fabric near to the last stitch so that there is no cushion fabric left showing in between scraps. Pull the thread tight so the off-cut is secure.

Image

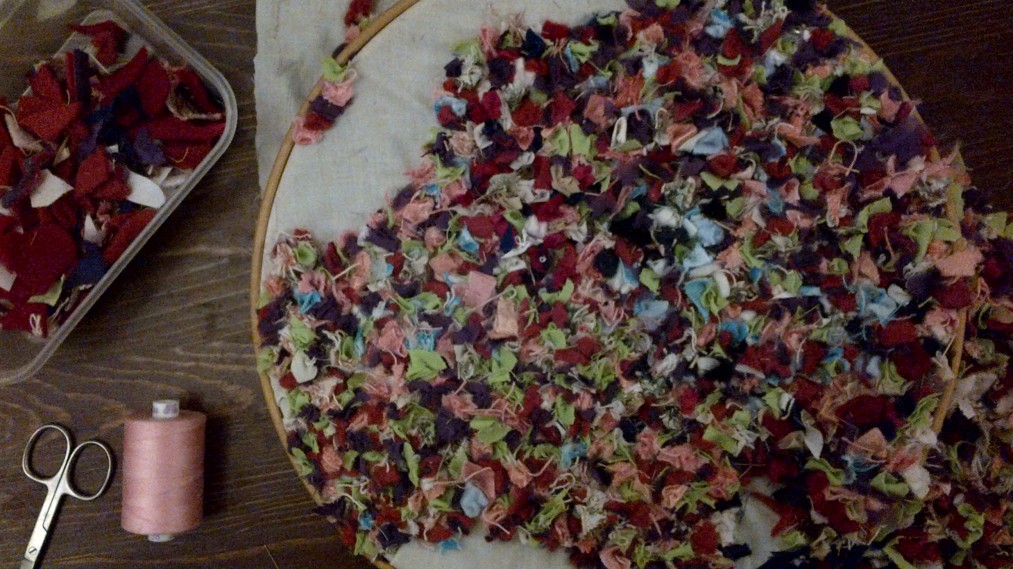
Continue to do this until your whole template is covered.

Image


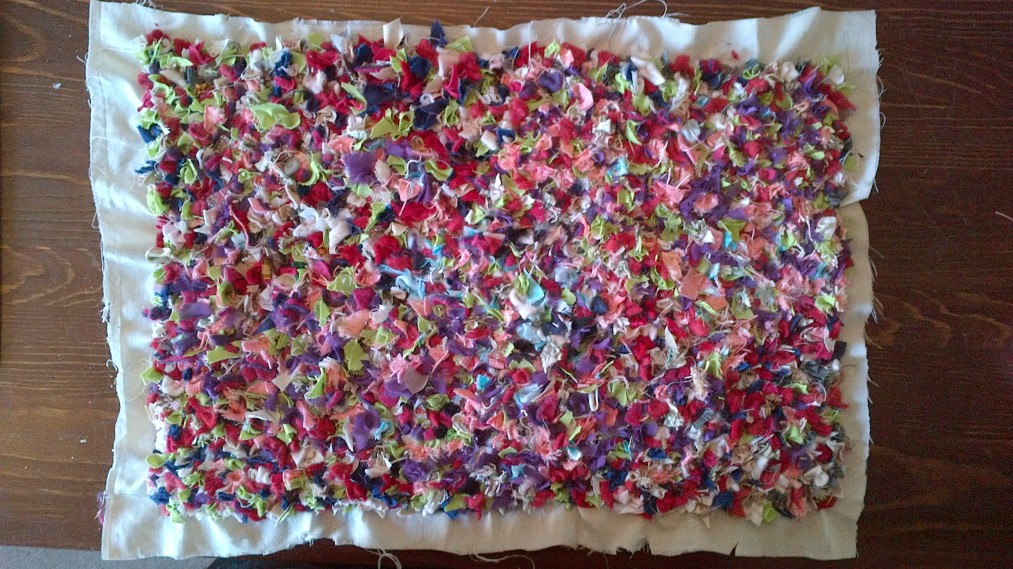
The fabric will ruffle a bit when you take it off the ring. Don’t worry, once you are finished the weight of it will keep it flat.

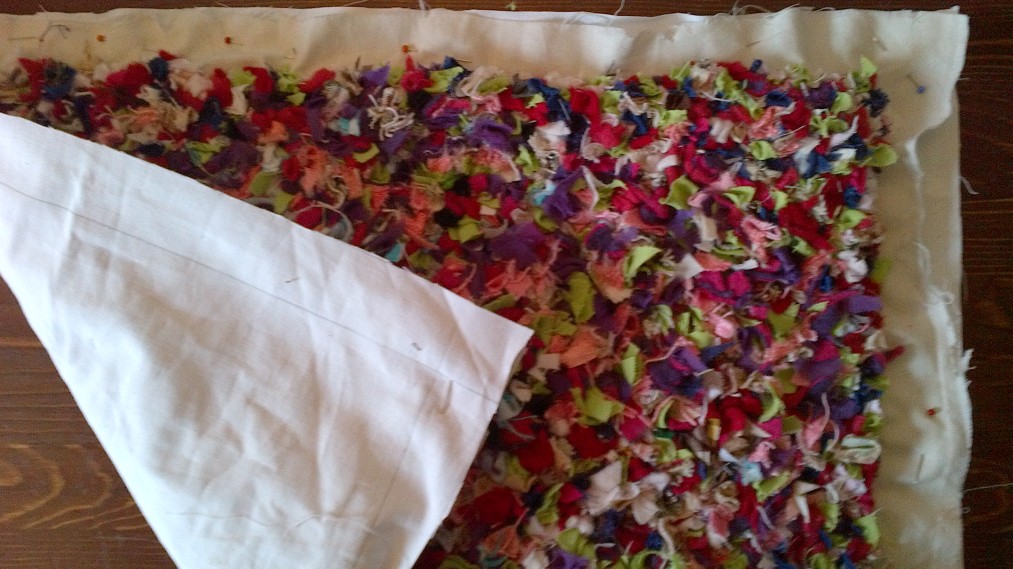
3) Put your cushion together.

Measure your lining fabric out so it is the same size as your cushion measurements and pin it to the back of your finished off cut design

Image

Measure out two pieces for the back of your cushion (same size as cushion) but add 1 1/2 inches to the depth on each piece and remember to leave a 1/2inch rim around the edges.

Fold your two backing pieces in half and place both on top of your off cut design so they overlap in the middle. (make sure the cut edges are on the edge and the folded edge in the middlw!) and pin everything together!

Image

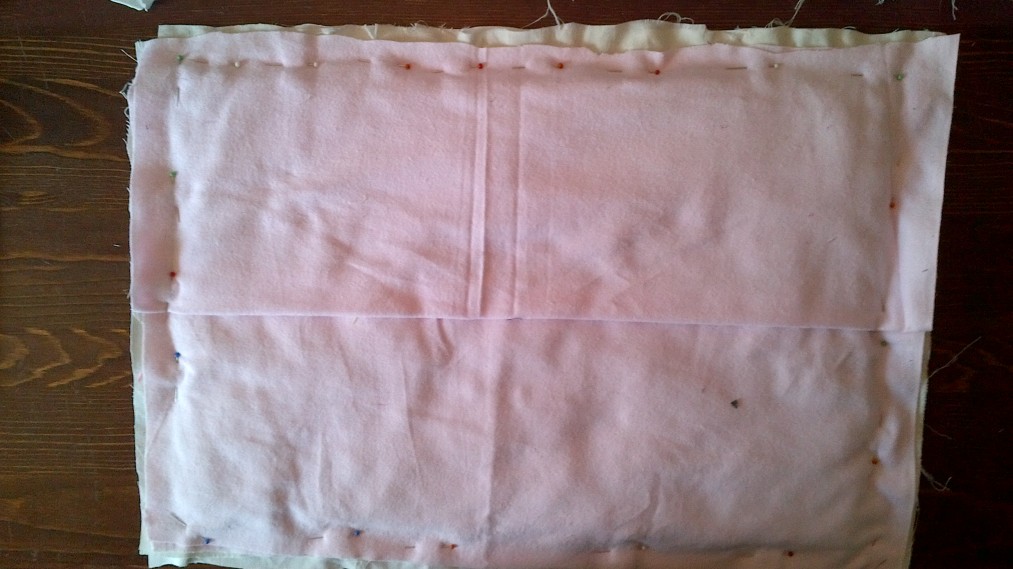
Now sew along the lines you made earlier. Trim the excess, fold it back the right way and Hey Presto!!

Your very own ‘Bits and Bobs’ cushion 🙂 

Image

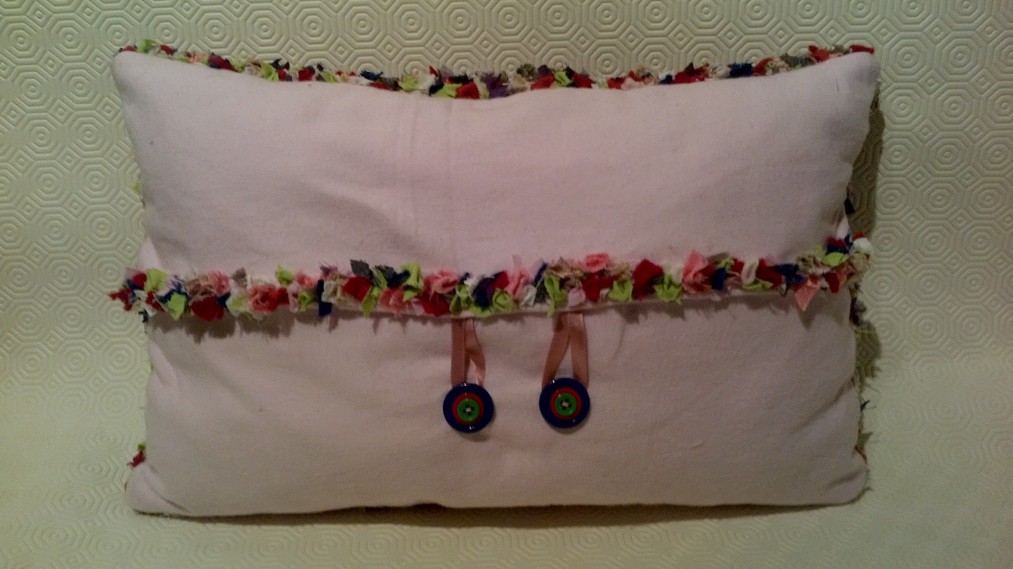
You can personalise the cushion however you want, I added a line of off cuts and a button tie. Happy making!

I hope you enjoyed this how to……brought to you by Crafty Love and contributed by Magpie! 

You can find Crafty Love Facebook page here, for craft material give-away’s, swaps and more up-cycling ideas!!:

http://www.facebook.com/pages/Crafty-Love/167446303366034

Please comment if you enjoyed this post, it’s lovely to get feedback 🙂 x


How to – Ferrero Roche box into night-light!!

Ok so this may sound a little bizarre…..but stay with me! I promise you this is worth it! Like most crafter’s I’m a bit of a hoarder and had (over many year’s of course) collected quite a stash of empty Ferrero Roche boxes. Obviously not all eaten by me, ahem. You can use any similar […]

My First Blog (gulp)

Hello!

As you may have read in my ‘about’ section, my name is Alice and I run a Facebook page called Crafty Love. It’s a page designed to encourage ‘up-cycling’, where crafter’s and craft lover’s can swap or give away their unwanted craft materials.

Yes! I said GIVE AWAY!

When I first had the idea for the page there was part of me that thought I was slightly crazy for thinking that anyone would want to give away their unused craft materials…..just to be nice?! But apparently they do! I was amazed when the page started to gain hundreds of ‘liker’s’ (these are essentially fans of the page, for the non Facebook users among us!) within it’s first week. In the first few days I had three separate users offering items to GIVE AWAY and they all agreed that it really does give you a warm and fuzzy feeling inside!

Much to my delight, the donations just keep on coming and I now thank people for their generosity by ‘sharing’ their page on my wall. This basically means that I show their page to all my fans (currently 1,272 of them) which hopefully re-pays their kindness by helping them show off their lovely hand-crafted items.

I also have an almost constant barrage of swappers and sharers on my wall, which is lovely to see. I was very pleased to see a picture of a beautiful bracelet that had been made with items swapped on Crafty Love! It’s so simple to get involved, all I ask people to do is email me or post pictures of the things they would like to swap on my wall. I find out what they are looking for in return, then share their pictures with all my fans to hopefully find them a mutually beneficial swap!

The page has been running for nearly 6 weeks now and it really is developing all the time. I have two games which I regularly play on my wall, as a way of helping all my fans network with each other and also giving them a chance to show off their crafty items. The games are called ‘Giving Inspiration’ and ‘Crafty Love Kiss-Chase’. I’ve only played Kiss-Chase once so far but it was very popular (apparently my fans love to smooch!) and I’m looking forward to streamlining it and playing it lot’s in the future!

I have also begun to support two charities as a direct result of the page. This is something that I’ve always wanted to do and the opportunity has now presented itself. The first charity that I’m trying to help is Preemies UK. They are a lovely bunch of ladies who knit items that are then sent to 130 neo-natal and special care units across the UK, to help support the families of tiny babies sadly born too soon. I am actively encouraging my fans to DONATE any wool that they’re not using to this worthy cause. I frequently share their page on my wall.

The second charity I’m supporting is Harrison’s Fund. Now, this charity is close to my heart as Harrison is the son of a family friend. His parent set up the charity shortly after finding out that Harrison had been diagnosed with Duchenne’s Muscular Dystrophy. Their courage has truly inspired me. I have decided to hold a charity auction to try and raise as much as I can for the fund. I already have lots of crafter’s on board who have generously donated their handmade items…so finger’s crossed! It’s the first auction I’ve ever organised so wish me luck!!

As part of my mission to encourage up-cycling I also invite people to share pictures on my wall of anything that they have re-created! I have had some great contributions and (once again) the page has inspired me to start blogging to spread the up-cycling bug! I will be regularly posting ‘how-to’ guides on how to have a go yourself! Some will be my own ideas, some will be from my fans and hopefully some will be from YOU reading this blog!

Think I better leave this post here as I do feel I have waffled on a bit! Looking forward to creating many more crafty blogs! 🙂 x